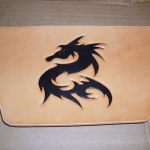
Projects from 2011

Posted in Projects on January 2nd, 2012 by The Cyberwolfe

Hey wait! I swear I’m not dead yet!

Okay, you couldn’t really tell considering how I somehow neglected to post anything for an entire year.

Well, better late than never, right? Right? Okay, here are a few things I worked on in 2011, in no particular order:

Napkin Rings:

Napkin Rings

My daughter’s school held a fundraising auction, and I donated these. Apparently, they were the highest-bid item on the list. :)

Belt Holster:

Holster for a Multi-Tool

Not one of my best works, but not bad for my first prototype of a formed-leather project. For this, I soaked the leather in water and then pinned it over a wooden form I had made approximating the shape of the multi-tool I always carry. Several months of daily wear has smoothed it out a bit and it actually looks better now.

Archery Armguard:

Archery Armguard

The prototype that never got finished. I got this far on it and realized that I had made a mistake in the knotwork. (Gah!) It’s also the last piece of that particular black leather I had, and I don’t think it will hold up well to having the stitches ripped and a replacement carving sewn back on, so I’m waiting to replenish my supplies before I get on with this one. I never did figure out how I was going to strap it to my forearm either…

Leather Valet:

Rose-themed valet tray

This was the Girlfriend’s Xmas present for 2010. She was forever forgetting where she had emptied her pockets after coming home, so I made a memorable place for her. You can’t tell from the photo, but the area around the rose is a deep blue, while the outer ring is a forest green. This project proved how invaluable a stitching horse can be.

Upcoming projects, if I ever manage to get around to them:

Sword frog, a cover for my new e-book reader, a harness for my own sword (shoulder-style)…

Project: Stitching Horse

Posted in Projects on November 21st, 2010 by The Cyberwolfe

I got a little distracted while building this, so I’ll put the whole thing up in one post instead of making you wait for it. Here’s a couple shots of the completed build, then I’ll break it down into components after the jump.

Completed Horse - side Completed Horse - front

The materials:

3/4″ plywood – I found that my local Home Depot carries several grades of plywood in 23″x23″ squares at a reasonable price. The downside is that these are usually prone to having more knots than the fine-grade full sheets. One of these was enough to complete the seat, arms and the lateral supports for the legs.

2″x2″ square stock – if you aren’t familiar with wood sizes, you’ll discover that they always exaggerate the dimensions by 1/4″ in each direction, which means a 2″x2″ is really only 1-1/2″x1-1/2″ – but that’s all you really needed anyway. Usually comes in 10-foot lengths which is plenty. My original plan called for the longitudinal leg braces to be the same material as the legs, but I messed up a couple of cuts and went with some pine out of my scrap bins.

Hardware –

  • a good hinge (Al used a piano hinge; I was going to use a door hinge until I realized I didn’t have room to mount it so I went with a cabinet “T” hinge – it wobbles just a touch),
  • several lag bolts with nuts and washers from 1-1/2″ to 3″,
  • a box of 2″ wood screws,
  • a 1″ welded D-ring, (I just had to replace my original due to stretch)
  • a pair of compression springs
  • some mild steel, about 12″. (Home Depot only sells 3-foot lengths)
  • a small bit of steel strapping,
  • a handful of 1″ screws to mount the Footman’s loops and the saw teeth.
  • 3  Footman’s loops and the Conway buckle (purchased at my local leather supply store.)
  • Lastly, there will be a bottle of wood glue and about 30″ of strap leather cut to 7/8″.

Read more »

Tags:

The non-leather leather project: a Stitching Horse

Posted in Projects on November 7th, 2010 by The Cyberwolfe

If any of you have ever done any leather sewing, you know that a stitching pony is an invaluable tool. After you start making things larger than a billfold or some of the more complicated projects, you realize that you could really do well with a larger stitching pony – a stitching horse.

When it comes to full-size stitching horses, I have seen reference to three different types, two of which are built much like a child’s rocking horse in that they offer a full seat and have 4 legs under them. The first has a belt that travels through one of the clamp jaws to attach to the other at about the halfway point, leaving you some 8-12″ of jaw depth to work with.

The second type, called a Saddler’s Horse, has a complicated mechanism underneath the seat to close the jaws, giving you a much greater depth in the jaw. Saddle-making requires that greater depth, whereas the rest of us can get by pretty well with the harness-maker’s horse.

The third type is used mostly in the U.K. and Europe and is called a Clam. It is basically just a really big set of tweezers that rest on the floor and you hold them closed with your knees while you stitch. The arms of the clam are shaped in such a way that their resting position closes the jaw so you have to pull the jaws apart to insert the workpiece. This model offers the benefit of requiring far less space and you can adjust it to your own preference very easily. It requires a stool for you to sit on, however.

In his book The Art of Hand Sewing Leather, Al Stohlman includes the complete plans for what he calls his “Quarter Horse”, a stitching horse that rests upon any available chair and only has a pair of front legs. It is a variant of the harness-maker’s horse that has the strap going through the jaw arm for tension.

I’ve done a lot of research on this, and it has been very difficult finding someone willing to sell one of these, so I’ve decided to build it myself. Over the next couple of posts, I’ll be documenting the construction of a 4-legged variant of Al’s “Quarter Horse”.

Dice Tube Project

Posted in Projects, Tips & Tricks on July 27th, 2010 by The Cyberwolfe

As some of you know, I have played various pen-and-paper RPGs since I was about 9 years old, and as such have had many different methods for storing the required dice. Now that I have all these tools and supposed skills, I thought I would do something nice in the way of a new dice case.

Now, for most geeky gamers, the classic method of dice storage is a Crown Royal bag – it’s a good size for dice, it’s garishly purple (and therefore easy to spot among the clutter) and it gives you that extra bit of cred as a younger gamer to have something that was associated at one time with alcohol of a better variety than PBR or Ranier. Myself, I’ve had things like fishing-reel cases and random belt pouches, and my last one was a suede pencil-case I picked up at a bookstore. I like the style of the pencil-case the best I think, since it also leaves room for a couple pencils and other such that a floppy bag doesn’t. It would also give me a chance to practice up on another method of stitching: the Butt Stitch.

(DunDun-Dunnn….)

Once again, I go to my Al Stohlman’s Guide to Sewing Leather where he outlines the basics of this difficult stitch – and of course he makes it look a lot easier than it is. The idea is that you take two pieces of leather and line the edges up. You then stab (using a curved awl) through the top side out the edge of piece A, then in the edge and out the top side of piece B. Picture it as a pair of phone books: you stab through the front cover and come out in the N-section, then into the N-section of the next book and out the front cover. Here’s a picture:

Read more »

World’s coolest screwdriver case.

Posted in Projects on January 16th, 2010 by The Cyberwolfe

As some of you know, I pay the bills around here by being an IT guy during the day. Sometimes, this requires me to take things apart, like laptops. Laptop manufacturers don’t always want you to be able to take them apart, however, so they use some oddball screws or very tiny screws to keep out the amateurs.

I recently decided to invest in some better miniature screwdrivers, and found a set with a single handle and interchangeable blades that takes up a very small amount of room in my backpack kit. The case, however, is an uninspiring plastic jobbie with a blown-plastic insert. The lid is kinda thin, and I get the feeling it will get cracked before long.

I smell a new project! Read more »

Quick holiday project

Posted in Projects on December 12th, 2009 by The Cyberwolfe

Because sometimes, red velvet just doesn’t say it right.

Stocking1small

Real simple project, just cut out two shapes and stitch them together. The only tricky part was to keep breathing while trimming down the bunny fur for the cuff – cut bunny fur floats, and that shit gets everywhere.

The cuff is two 5″ tall strips of rabbit fur cut from two different hides to get a good quality section with no blemishes. Sew them at the sides so it forms a circle, then stuff the circle into the stocking until the top edges line up. (Fur should be touching the inside of the leather). For best results, tack the fur in place in about 4 places to make sure you’ve got it centered and not bunched up.

Now stitch the tops together (I used a simple running loop stitch), then turn the fur out and down, and viola: fur-cuffed stocking.

Hatchet Scabbard – finished

Posted in Projects on July 19th, 2009 by The Cyberwolfe

Remember what I said about how to dye it? Well, I again decided on an oil-based dye, and the first step with that is to wipe it down with oil and let it set for a day before dying. What that got me was this:

Finished scabbard

Finished scabbard

…and I decided it was just too pretty to dye, so I gave it a coat of sealant and called it good.

I think I’m actually getting good at this…

Hatchet Scabbard

Posted in Projects on July 16th, 2009 by The Cyberwolfe

The last event we went to, we brought out the fire pit and I ended up using the Gulach BFK9000 to split kindling. It worked, but it really isn’t designed for the task and it’s actually too sharp now for this sort of thing.

With that in mind, J went out and bought us a new camp hatchet, and sure enough, i decided it had to have a scabbard for safe transport.

I’m not sure if J and Illyana intended for me to be making a scabbard for it, but they sure didn’t complain when I offered. They’re no dummies.

Anywho, here’s what it looks like before the dye. I made it ambidextrous, so it’s pretty on both sides.

hatchet1

hatchet2

Those rivets are called double-caps, and designed just for projects like these where you can’t hide the ugly side.

In this design, the top and bottom rivet are there to keep the scabbard from pivoting off the blade (the tips of the blade are almost right at the points of the trefoil) and the two middle rivets are there to keep the blade from cutting the stitches.

Now to figure out how I want to dye it…

Bracers – finished!

Posted in Projects on February 17th, 2009 by The Cyberwolfe

It’s taken me a while to get around to posting the final pictures, I apologize for the delay. Here you are –

The Phoenix:

phoenix_bracer

…and the Dragon:

dragon_bracer

Not bad, if I do say so meself :)

More on the bracers

Posted in Projects, Tips & Tricks on January 4th, 2009 by The Cyberwolfe

Now that Xmas has passed, I can tell you about two of the gifts I gave away this year – Phoenix and Dragon bracers. Here’s a couple of pics:

Dragon…

dragon_cutandbeveled

…and the Phoenix

phoenix_cutandbeveled

Notice these will have laces instead of buckle straps. I did not have wrist measurements for the recipients, and lacing them gives much better adjustment. For colors, the Phoenix is going to be dyed black and then the bird will be painted red, possibly with some orange and yellow highlights if I’m feeling daring. The Dragon gets a medium brown background with the dragon itself dyed black.

For that, I’m using the brush dye method, and here’s what it looks like at phase 1:

dragon_dyephase11

Astute observers may note that the dyed version doesn’t have grommets yet – that’s because I screwed up the dye process on the first attempt. I dyed the dragon and the background with the brush method the first time, but the brown dye just does not cover evenly, and I could not find a way to smooth it out for the life of me. This time, after I have soaked all the black I can into that dragon, I will apply a few coats of resist and then use a wool dauber to spread the brown dye right over the top.

And if that doesn’t work out, the next one gets dyed brown first and then I’ll paint the damn dragon on.