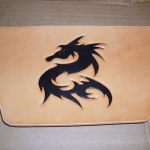
Belt Knife Sheath

Posted in Projects on November 16th, 2008 by The Cyberwolfe

My friend Illyana found a nice little belt knife at the last event we went to, but the sheath was just atrocious – looks like it was one they had just lying around and it fit well enough, so they packaged it. I couldn’t stand to see the knife in that ugly thing, and Illyana had a birthday coming up, so for the second time now she gets a new scabbard.

Now most of you should be familiar with the sheaths sold today – they only encase the blade of the knife, and then have a snap-strap to secure it in place. While this is a useful configuration, the more period method is the pouch sheath, which leaves only the last inch or so of the handle exposed. This is actually a more secure arrangement than the snap method, since you won’t ever accidentally unsnap it and risk the knife falling out on your foot, and with proper design the sheath will hold the knife securely through much bumping and jumping around.

To give full credit, I stole the design from Bruce Evans and the tutorial you will find at that link. I left the points sharper on mine than he did, but I followed his tutorial with the exception of using a drill bit instead of a nail to punch the holes for sewing, and I used a heavy thread instead of sinew. The sinew would have been more period, but I didn’t have any on hand.

I skipped the wax bath, mainly because I don’t really like the texture of wax-treated leather. Illyana is mildly into leatherwork herself, so she knows how to care for it properly. I also decided to forego any carving on this one, since I was going to dye it black, and the decoration gets lost in a black dye unless you paint it afterward. Knife sheaths get bumped around a lot so that paint would get abused pretty badly.

Here it is basically complete and waiting for the oil to dry before I dye it (with the original sheath for comparison.)

Scalloped Sheath

And with the knife sheathed:

Knife sheathed

Unfortunately, I forgot to snap a pic after I dyed it, so you’ll just have to use your imagination.

Decorated cuffs

Posted in Tips & Tricks on October 19th, 2008 by The Cyberwolfe

Here’s the latest finished project, a pair of fancy-decorated cuffs:

Hammer Bracers

These are the 5″ cuffs with buckles. They cover about half of your forearm (as seen in the last post). For the buckles and straps, I went with a slot-mount this time instead of the surface-mount method of the bracers seen previously. This allowed me to minimize the surface area required for them, as well as simplifying the construction process. I did, however have to re-create my construction template for the buckles from scratch, so once again one side fits better then the other. One of these days I’ll get it right.

For the finish, I used a Fiebing’s oil dye, followed by Angelus leather paint and topped off with Fiebing’s Tan-Kote. This design would probably look good in a nice brown, and leaving the carved design un-dyed like I did in the last pouch project should work out pretty well. I was making this pair for myself, though, and my current wardrobe is all black.

One truly nice point of this build was using leather from a full side instead of a belly cut. Bellies are great for prototypes and one-off designs, but for your best work use the best leather. Even then, I skimped a bit and used a “tannery run” grade here instead of an “A” grade leather. The main difference you will find between the two from what I could see at the leather supply store is that TR-grade doesn’t have as even of a surface color as A-grade. If you plan on dying or painting the finished product, however, the leather itself is the same quality.

Arm Bracers and Cuffs

Posted in Tips & Tricks on September 23rd, 2008 by The Cyberwolfe

No, not those kind of cuffs – these are just wide bands of leather that wrap around your arm at the wrist like a super-size watchband.

A friend of mine wants a pair of bracers or cuffs, he isn’t sure which. So, this post is to get some pictures out where he can see them to make up his mind. (Note: the bracer pictured here is an early prototype made from tannery-dyed leather that I will not be using again. It is, however, the only finished one I have at the moment.)

Here’s a cuff:

And a bracer:

Options:

Tied or Buckles?

Like I said, that bracer is a prototype – the straps for the buckles have been re-designed and look much better in version 2.

Trefoil Pouch – finished!

Posted in Projects on September 23rd, 2008 by The Cyberwolfe

Here’s a quick pic of the finished pouch:

I ended up doing a selective dye method – I used a brush instead of a wool dauber to apply the dye, and I like the effect. This is the first finished piece after talking with a guy who swears by the oil dyes. His advice was to rub the piece with Neatsfoot Oil and let it sit for a day, then use an oil dye. Not too shabby.

Yet Another Pouch

Posted in Projects on September 7th, 2008 by The Cyberwolfe

One of the things I have been trying to do since I started all of this is to replace all of my current leather gear with something more elaborate and decorative. A mug frog is fairly simple, but my pouch is sorely in need of an upgrade.

It was purchased at an event, and cost was a major factor at the time, so it is very plain, the leather is a little sub-par, and I’m not 100% pleased with the design. So, I’ve made a lot of pouches in an effort to come up with the perfect replacement.

My first attempt was a success as far as construction went, but it was still plain and a little small for the amount of junk that normally gets tossed in there at an event. (Smokes, lighter, mints, flashlight, about half of my wallet – you get the picture.) So, off I went again. And again. And again…

The latest version is yet another change to the overall design – just two pieces instead of three or four in an effort to reduce the amount of sewing. The design works, but again this one is a tad small. I do need to pile up some stuff to auction off for our pavilion fund, however, so I thought I would dress this one up with some tooling.

The leather in the construction won’t tool, so I will be sewing or riveting something on to the flap. I’m leaning toward rivets – I like the visual better sometimes, but mostly I just don’t like sewing. (I really need a deeper jaw on the stitching pony for most of my work.) I was playing around with my drafting tools, and came up with a nice Celtic Trefoil design:

The rivets will go in the center of the three foils and also on either side of each tip, so it will be pretty secure. The closure, of course, is always my biggest headache of the design process because there are so many ways to do it, and what will work best? I really only get one shot at each pouch.

I thought I would give that Walnut oil dye one more chance, and used it on another design that I had screwed up, and I am once again thoroughly unimpressed with the results. There will be a trip to the store on my schedule for this weekend.

This last weekend, however, put another two projects on my list, as J bought a new sword and needs a good frog to hang it off his belt and K got herself a new knife with a lousy scabbard. Maybe I should just buy a hide this weekend while I’m at the store…

Designs and such

Posted in Tips & Tricks on August 21st, 2008 by The Cyberwolfe

There have been a couple of comments recently asking about where I get my design ideas and whether or not I will be publishing patterns. Honestly, whatever I didn’t pull out of my own head was more than likely either copied off of something I had seen at an SCA event or something I found on the Internet.

I’ve seen some cool ideas for carving on tattoo websites, but I always make sure that the images I base my designs on are not copyrighted in any way. In this day and age, you gotta be real careful about what you copy, even if you don’t plan on selling it. The last thing I want is for some jackass lawyer to come ’round with a stack of paper in his hand because my design looks like his client’s.

Now, as for whether I will publish or give away my patterns and designs, allow me to put on my Asshole Hat for a second here. The entire point of doing this sort of thing is to be creative and enjoy yourself. I will never publish complete designs with instructions and measurements and such, because I want you to use the grey matter between your ears. If all you are looking for is instructions on pounding out some crap to sell or give away or whatever, go somewhere else. The world is full of knock-offs, and I would much prefer you take enough pride in your work to screw around with it until you think it looks good and would be happy to give it to a friend and have them show it off ’round the campfire.

There has been more than one occasion where I have taken a half-hour to carefully replace a screwed up rivet because i couldn’t bear to look at it. Would you?

As an example of this, I was at an event last year and discovered I had left my hat at home in July, and needed to get some shade on my head quick. I wandered over to a haberdasher’s and selected a wide-brimmed number with one side folded up. Now, it was all leather, but the guy had slammed it out on a commercial-grade machine, had run over his own seams partway instead of matching them up, and the hat generally had this “half-assed” feeling to it, like the maker was just trying to push out some stock for his booth.

Unfortunately, the guy got me talking and I forgot to ask how much it was until he was halfway through sizing it for me. He wanted $125 for this thing. The leather itself cost maybe $15, and the skull pinning the side up another $3, so he basically wanted $112 for the _maybe_ two hours he spent building and fitting it. If he hadn’t sized it for me I would have turned and left – as it was, I bought the damn thing and felt like an idiot for it.

So. The point here is that if this is the kind of work you plan on doing, get the hell off my website.

If, however, you plan on taking pride in your work, giving attention to the details and making things for friends and family that you will be proud to have them fuss over, well, you my friend are welcome here. But I still want you to think! Be creative! Use my work as an example of what can be done, but don’t blindly copy it for yourself. (Unless, of course, I have managed to perfect something beyond any hope of improvement. Then you may copy. snerk)

In the end, it all comes down to what you want other people to think of your work. Are you just goofing around in the garage, or do you want to make something to remember? Do you want your projects to get tossed aside after a year or two, or do you want your grandkids to ooh and ahh when you tell ’em you made it?

Me? I want the grandkids to ooh and ahh.

New tools

Posted in Tips & Tricks on July 7th, 2008 by The Cyberwolfe

Just a quick little teaser of the Camera Case project to show off a technique I just figured out – here’s the side panel of the case all carved up:

The new technique is the gridwork in the middle of the design. I purchased a couple of new shaders a while back, and this is the first chance I’ve had to play with them on a real design. I like the way it turned out.

The trick to using tools like this is all in the alignment – if you overlap them just a touch, it looks good. If you try to line the impressions right next to each other, you may end up with a thin line of material that isn’t stamped. As always, you gotta practice with it.

Quick Project: Skirt Chasers

Posted in Projects on June 13th, 2008 by The Cyberwolfe

These little things are designed to help a lady keep her skirts out of the mud – or perhaps show off her petticoats, if she’s of a mind :) It’s just a simple length of leather folded over to pinch another fold with some D-rings in their grip.

To use them, hang them on your belt and pull a section of fabric up through both rings, then run it back through only one of them and pull it tight. (Just like you would for a motorcycle helmet strap.)

I like to use an offset color for the smaller piece. Use a stiff leather for the long piece and a softer leather to hold the rings so they move freely. It helps to skive down the tips of the stiff leather if your rivets aren’t long enough. You can also groove the leather at the fold, but you can usually just give it a couple whacks with a mallet and pound it into submission ;)

A quick note on tools

Posted in Tips & Tricks on June 5th, 2008 by The Cyberwolfe

Actually a double post: tools to have, and how to carry them around!

We’ll start off with a picture:

Tool roll - open

Here we can see some of my most-used tools in the roll-up pouch I made for them. From left to right, we have:

  • a slot punch for belt buckles,
  • my stitch groover,
  • a belt-tip punch,
  • a couple of bevelers,
  • my #2 edge tool,
  • a 4-way hole punch,
  • my folding razor knife,
  • my swivel knife,
  • a selection of hole punches.

I also have a rotary punch, which is an excellent tool, but it’s only good for punching holes less than an inch away from an edge. For holes farther into a piece of work, you need a simple punch like these above.

The swivel knife is of course used for carving leather, and that razor knife makes cutting out the pices so much easier than using shears on heavy leather.

The 4-way punch doesn’t get a lot of use. I don’t do much in the way of lacing leather, and that is the main use of it. The #2 edge beveler next to it, however, gets used on every project to round off the square edges left by my razor knife.

The beveling tools next to that are used on leather carvings after the swivel knife to add dimension to the artwork. The stitch groover has gotten a lot of use lately, what with all the sewing projects I have attempted. The remaining tools are just for making straps – one puts a nice clean end on the strap, the other punches the slot for the tongue of a buckle or the key slot for a Sam Browne closure.

The tool roll was one of the first few things I made after my girlfriend gave me a starter set of tools for Xmas. I like having pockets and hooks for my tools, and this seemed like a good way to keep them stored and organized in my tool bag so I wasn’t always digging through a pile of stuff for them.

I started with a chunk of scrap leather, and only trimmed a little of it off to get the shape you see here. Then I just laid out my tools, folded the bottom over them and drew lines in between for a seam guide. i started on the right, and you can see how I mis-judged how the leather would gather – I thought that pocket would only hold one punch. The one next to it went a little small – that’s the only punch that will fit there. Luckily enough, I had it figured by then and the rest went pretty smoothly.

To finish the project, I whipped up a couple of buckled straps and riveted them to the left side. Here’s what it looks like all rolled up:

All rolled up

With the top flap rolled down over the tools and then the whole thing rolled up and buckled, it keeps everything tucked away inside, and the bundle fits neatly into my tool bag.

There is a selection of other tools in my bag, but the bag itself has many pockets that does the trick quite well. My stamping tools, however, will likely get a new case in the near future since they are currently stacked up in my parts box and I invariably have to dig all of them out to get the one tool I want. (Which is why the bevelers got moved to the tool roll.) It’s getting late though, so I’ll leave those for another post.

The needle case

Posted in Projects on May 29th, 2008 by The Cyberwolfe

I suppose this should be under Projects, but it was such a simple little thing, and I did it for fun while camping over Memorial Day weekend. I had been keeping my sewing needles piled into one of the segments in my parts box – the same one I keep my stamping tools in. This has led to a couple of near-misses of me stabbing my finger, so it was time to move them.

Construction was fairly simple. Two pieces sewn together at the bottom, with a third piece of suede folded in between to push the needles through. A little tooling and a snap closure, and voila! Here’s the finished product:

Did I mention I went camping at a Pirate event? :)

The big surprise for me was that I sold everything I had at my friend’s merchant booth – I almost broke even for the event! I guess now I have to build some more goods to restock.