Bracelets

Posted in Tips & Tricks on January 5th, 2014 by The Cyberwolfe

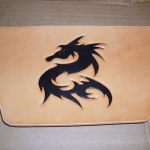
I was inspired to make bracelets as gifts for my wife and daughter this year and thought you might like to see the results. Each one is a two-layer affair, with the bottom layer getting the carving and the top layer merely acting as a frame. Here’s the one I made for my wife:

Bracelet for my wife

And here’s the one for my daughter. I gave hers and archery theme:

Bracelet for my daughter

For those who may attempt something like this yourself, make it at least 1/2″ longer than you think it needs to be. Wrapping a measuring tape around the wrist doesn’t account for the thickness of the material, and you’ll end up being the wrong size. The one for my wife there is the MkII, and I’ll be re-making the one for my daughter as well for this reason.

Comments mostly closed

Posted in Tips & Tricks on February 9th, 2013 by The Cyberwolfe

Due to the number of assholes spamming my comments, all comments will close after a number of days.

To all of you assholes who have nothing better to do all day than solve my captchas, bugger off.

New tools and new projects

Posted in Tips & Tricks on September 9th, 2012 by The Cyberwolfe

After a lengthy hiatus, I managed to get some new leather and some time back into my busy life, so I’ll be posting some new projects over the coming weeks. First up is another knife scabbard, this one for a dagger from my SCA kit. I’ll be stitching it tomorrow, so pictures will come soon.

On the subject of new leather, I’ll say it again, or maybe for the first time, or something…: buy leather in person. I lost about $24 in shipping inferior product back to the internet seller. They were cool and refunded me, but I would have saved the shipping both ways plus about 2 weeks of delay had I just gone to my local shop first.

Okay, on to the tools. I was digging through the Tandy catalog the other day and saw that the Al Stohlman super-froofy swivel knife was on sale for about the same price as they normally charge for a blade, so I snagged one.

Swivel knife comparison

Yes, the decoration is a bit over the top, but let’s face it: so is 99% of most Western-style leather carving. On the practical side, Read more »

Dice Tube Project

Posted in Projects, Tips & Tricks on July 27th, 2010 by The Cyberwolfe

As some of you know, I have played various pen-and-paper RPGs since I was about 9 years old, and as such have had many different methods for storing the required dice. Now that I have all these tools and supposed skills, I thought I would do something nice in the way of a new dice case.

Now, for most geeky gamers, the classic method of dice storage is a Crown Royal bag – it’s a good size for dice, it’s garishly purple (and therefore easy to spot among the clutter) and it gives you that extra bit of cred as a younger gamer to have something that was associated at one time with alcohol of a better variety than PBR or Ranier. Myself, I’ve had things like fishing-reel cases and random belt pouches, and my last one was a suede pencil-case I picked up at a bookstore. I like the style of the pencil-case the best I think, since it also leaves room for a couple pencils and other such that a floppy bag doesn’t. It would also give me a chance to practice up on another method of stitching: the Butt Stitch.

(DunDun-Dunnn….)

Once again, I go to my Al Stohlman’s Guide to Sewing Leather where he outlines the basics of this difficult stitch – and of course he makes it look a lot easier than it is. The idea is that you take two pieces of leather and line the edges up. You then stab (using a curved awl) through the top side out the edge of piece A, then in the edge and out the top side of piece B. Picture it as a pair of phone books: you stab through the front cover and come out in the N-section, then into the N-section of the next book and out the front cover. Here’s a picture:

Read more »

Upcoming projects

Posted in Tips & Tricks on March 28th, 2010 by The Cyberwolfe

I may be taking a year off from eventing, but that doesn’t mean I don’t have projects in the pipeline. In fact, I may be working through this year to put together stock for selling at events. We’ll see how it goes.

List of upcoming Projects:

  • Archery arm guards
  • Pouch with a pocket for fire tools (magnesium starters or lighters)
  • More skirt chasers!
  • Sword and dagger frogs
  • Et cetera.

I’ll post as I have progress.

Trouble with dye

Posted in Tips & Tricks on July 16th, 2009 by The Cyberwolfe

You remember that scabbard I made for the huge knife? Well, a problem developed after a time with the finish. It seems to have tarnished to a greenish sheen reminiscent of that found on old copper. The scabbard’s owner thought it was an effect I had aimed for and rather liked it, but it’s been eating at me since I saw the green the first time. Here’s a pic:

scabbard_before

Obviously, this just won’t do. The problem is, how to fix it?

Well, I took the piece down to the good folks at Oregon Leather, and they showed me how to use Carnauba Cream to remove the tarnish. Rub the product on, let it dry, and then buff it out with some sheepskin. Here’s what you get afterwards:

scabbard_after

Not too bad. It may take another coat before I’m completely happy with it though.

A little dice bag for the Little Grey Duck

Posted in Tips & Tricks on April 3rd, 2009 by The Cyberwolfe

So, if any of you dig through the RPTools forums, you may have noticed my promise to put up a custom dice bag as the prize of a betting pool. As per usual, I needed to start with a prototype, and this one turned out well enough that I’m giving it to Greyduck as a sort of belated birthday gift. Besides, I dragged him into tabletop RPG games, so I might as well feed his habit. (And neither one of us drinks Crown Royal, the usual source of geek dice bags.)

Here’s the finished prototype:

simple dice bag

simple dice bag

Now those of you in the forums may know that the purpose of the betting pool is to guess the final build number of MapTool 1.3, and here I’ve gone and carved the symbol for DiceTool, which has been in released status for quite some time now. Truth is, the MT symbol substitutes a surveyor’s sextant for the die shown above, and it doesn’t carve well at that scale. It’s ok I guess, but I didn’t like the three tests I did of the sextant, so I’m putting the DT emblem on the dice bag – which makes sense anyway.

If the winner complains, he can always send it back :)

More on the bracers

Posted in Projects, Tips & Tricks on January 4th, 2009 by The Cyberwolfe

Now that Xmas has passed, I can tell you about two of the gifts I gave away this year – Phoenix and Dragon bracers. Here’s a couple of pics:

Dragon…

dragon_cutandbeveled

…and the Phoenix

phoenix_cutandbeveled

Notice these will have laces instead of buckle straps. I did not have wrist measurements for the recipients, and lacing them gives much better adjustment. For colors, the Phoenix is going to be dyed black and then the bird will be painted red, possibly with some orange and yellow highlights if I’m feeling daring. The Dragon gets a medium brown background with the dragon itself dyed black.

For that, I’m using the brush dye method, and here’s what it looks like at phase 1:

dragon_dyephase11

Astute observers may note that the dyed version doesn’t have grommets yet – that’s because I screwed up the dye process on the first attempt. I dyed the dragon and the background with the brush method the first time, but the brown dye just does not cover evenly, and I could not find a way to smooth it out for the life of me. This time, after I have soaked all the black I can into that dragon, I will apply a few coats of resist and then use a wool dauber to spread the brown dye right over the top.

And if that doesn’t work out, the next one gets dyed brown first and then I’ll paint the damn dragon on.

Decorated cuffs

Posted in Tips & Tricks on October 19th, 2008 by The Cyberwolfe

Here’s the latest finished project, a pair of fancy-decorated cuffs:

Hammer Bracers

These are the 5″ cuffs with buckles. They cover about half of your forearm (as seen in the last post). For the buckles and straps, I went with a slot-mount this time instead of the surface-mount method of the bracers seen previously. This allowed me to minimize the surface area required for them, as well as simplifying the construction process. I did, however have to re-create my construction template for the buckles from scratch, so once again one side fits better then the other. One of these days I’ll get it right.

For the finish, I used a Fiebing’s oil dye, followed by Angelus leather paint and topped off with Fiebing’s Tan-Kote. This design would probably look good in a nice brown, and leaving the carved design un-dyed like I did in the last pouch project should work out pretty well. I was making this pair for myself, though, and my current wardrobe is all black.

One truly nice point of this build was using leather from a full side instead of a belly cut. Bellies are great for prototypes and one-off designs, but for your best work use the best leather. Even then, I skimped a bit and used a “tannery run” grade here instead of an “A” grade leather. The main difference you will find between the two from what I could see at the leather supply store is that TR-grade doesn’t have as even of a surface color as A-grade. If you plan on dying or painting the finished product, however, the leather itself is the same quality.

Arm Bracers and Cuffs

Posted in Tips & Tricks on September 23rd, 2008 by The Cyberwolfe

No, not those kind of cuffs – these are just wide bands of leather that wrap around your arm at the wrist like a super-size watchband.

A friend of mine wants a pair of bracers or cuffs, he isn’t sure which. So, this post is to get some pictures out where he can see them to make up his mind. (Note: the bracer pictured here is an early prototype made from tannery-dyed leather that I will not be using again. It is, however, the only finished one I have at the moment.)

Here’s a cuff:

And a bracer:

Options:

Tied or Buckles?

Like I said, that bracer is a prototype – the straps for the buckles have been re-designed and look much better in version 2.