Dice Tube Project

Posted in Projects, Tips & Tricks on July 27th, 2010 by The Cyberwolfe

As some of you know, I have played various pen-and-paper RPGs since I was about 9 years old, and as such have had many different methods for storing the required dice. Now that I have all these tools and supposed skills, I thought I would do something nice in the way of a new dice case.

Now, for most geeky gamers, the classic method of dice storage is a Crown Royal bag – it’s a good size for dice, it’s garishly purple (and therefore easy to spot among the clutter) and it gives you that extra bit of cred as a younger gamer to have something that was associated at one time with alcohol of a better variety than PBR or Ranier. Myself, I’ve had things like fishing-reel cases and random belt pouches, and my last one was a suede pencil-case I picked up at a bookstore. I like the style of the pencil-case the best I think, since it also leaves room for a couple pencils and other such that a floppy bag doesn’t. It would also give me a chance to practice up on another method of stitching: the Butt Stitch.

(DunDun-Dunnn….)

Once again, I go to my Al Stohlman’s Guide to Sewing Leather where he outlines the basics of this difficult stitch – and of course he makes it look a lot easier than it is. The idea is that you take two pieces of leather and line the edges up. You then stab (using a curved awl) through the top side out the edge of piece A, then in the edge and out the top side of piece B. Picture it as a pair of phone books: you stab through the front cover and come out in the N-section, then into the N-section of the next book and out the front cover. Here’s a picture:

Read more »

Upcoming projects

Posted in Tips & Tricks on March 28th, 2010 by The Cyberwolfe

I may be taking a year off from eventing, but that doesn’t mean I don’t have projects in the pipeline. In fact, I may be working through this year to put together stock for selling at events. We’ll see how it goes.

List of upcoming Projects:

  • Archery arm guards
  • Pouch with a pocket for fire tools (magnesium starters or lighters)
  • More skirt chasers!
  • Sword and dagger frogs
  • Et cetera.

I’ll post as I have progress.

World’s coolest screwdriver case.

Posted in Projects on January 16th, 2010 by The Cyberwolfe

As some of you know, I pay the bills around here by being an IT guy during the day. Sometimes, this requires me to take things apart, like laptops. Laptop manufacturers don’t always want you to be able to take them apart, however, so they use some oddball screws or very tiny screws to keep out the amateurs.

I recently decided to invest in some better miniature screwdrivers, and found a set with a single handle and interchangeable blades that takes up a very small amount of room in my backpack kit. The case, however, is an uninspiring plastic jobbie with a blown-plastic insert. The lid is kinda thin, and I get the feeling it will get cracked before long.

I smell a new project! Read more »

Quick holiday project

Posted in Projects on December 12th, 2009 by The Cyberwolfe

Because sometimes, red velvet just doesn’t say it right.

Stocking1small

Real simple project, just cut out two shapes and stitch them together. The only tricky part was to keep breathing while trimming down the bunny fur for the cuff – cut bunny fur floats, and that shit gets everywhere.

The cuff is two 5″ tall strips of rabbit fur cut from two different hides to get a good quality section with no blemishes. Sew them at the sides so it forms a circle, then stuff the circle into the stocking until the top edges line up. (Fur should be touching the inside of the leather). For best results, tack the fur in place in about 4 places to make sure you’ve got it centered and not bunched up.

Now stitch the tops together (I used a simple running loop stitch), then turn the fur out and down, and viola: fur-cuffed stocking.

Hatchet Scabbard – finished

Posted in Projects on July 19th, 2009 by The Cyberwolfe

Remember what I said about how to dye it? Well, I again decided on an oil-based dye, and the first step with that is to wipe it down with oil and let it set for a day before dying. What that got me was this:

Finished scabbard

Finished scabbard

…and I decided it was just too pretty to dye, so I gave it a coat of sealant and called it good.

I think I’m actually getting good at this…

Hatchet Scabbard

Posted in Projects on July 16th, 2009 by The Cyberwolfe

The last event we went to, we brought out the fire pit and I ended up using the Gulach BFK9000 to split kindling. It worked, but it really isn’t designed for the task and it’s actually too sharp now for this sort of thing.

With that in mind, J went out and bought us a new camp hatchet, and sure enough, i decided it had to have a scabbard for safe transport.

I’m not sure if J and Illyana intended for me to be making a scabbard for it, but they sure didn’t complain when I offered. They’re no dummies.

Anywho, here’s what it looks like before the dye. I made it ambidextrous, so it’s pretty on both sides.

hatchet1

hatchet2

Those rivets are called double-caps, and designed just for projects like these where you can’t hide the ugly side.

In this design, the top and bottom rivet are there to keep the scabbard from pivoting off the blade (the tips of the blade are almost right at the points of the trefoil) and the two middle rivets are there to keep the blade from cutting the stitches.

Now to figure out how I want to dye it…

Trouble with dye

Posted in Tips & Tricks on July 16th, 2009 by The Cyberwolfe

You remember that scabbard I made for the huge knife? Well, a problem developed after a time with the finish. It seems to have tarnished to a greenish sheen reminiscent of that found on old copper. The scabbard’s owner thought it was an effect I had aimed for and rather liked it, but it’s been eating at me since I saw the green the first time. Here’s a pic:

scabbard_before

Obviously, this just won’t do. The problem is, how to fix it?

Well, I took the piece down to the good folks at Oregon Leather, and they showed me how to use Carnauba Cream to remove the tarnish. Rub the product on, let it dry, and then buff it out with some sheepskin. Here’s what you get afterwards:

scabbard_after

Not too bad. It may take another coat before I’m completely happy with it though.

A little dice bag for the Little Grey Duck

Posted in Tips & Tricks on April 3rd, 2009 by The Cyberwolfe

So, if any of you dig through the RPTools forums, you may have noticed my promise to put up a custom dice bag as the prize of a betting pool. As per usual, I needed to start with a prototype, and this one turned out well enough that I’m giving it to Greyduck as a sort of belated birthday gift. Besides, I dragged him into tabletop RPG games, so I might as well feed his habit. (And neither one of us drinks Crown Royal, the usual source of geek dice bags.)

Here’s the finished prototype:

simple dice bag

simple dice bag

Now those of you in the forums may know that the purpose of the betting pool is to guess the final build number of MapTool 1.3, and here I’ve gone and carved the symbol for DiceTool, which has been in released status for quite some time now. Truth is, the MT symbol substitutes a surveyor’s sextant for the die shown above, and it doesn’t carve well at that scale. It’s ok I guess, but I didn’t like the three tests I did of the sextant, so I’m putting the DT emblem on the dice bag – which makes sense anyway.

If the winner complains, he can always send it back :)

Bracers – finished!

Posted in Projects on February 17th, 2009 by The Cyberwolfe

It’s taken me a while to get around to posting the final pictures, I apologize for the delay. Here you are –

The Phoenix:

phoenix_bracer

…and the Dragon:

dragon_bracer

Not bad, if I do say so meself :)

More on the bracers

Posted in Projects, Tips & Tricks on January 4th, 2009 by The Cyberwolfe

Now that Xmas has passed, I can tell you about two of the gifts I gave away this year – Phoenix and Dragon bracers. Here’s a couple of pics:

Dragon…

dragon_cutandbeveled

…and the Phoenix

phoenix_cutandbeveled

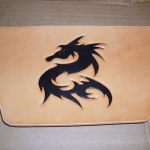
Notice these will have laces instead of buckle straps. I did not have wrist measurements for the recipients, and lacing them gives much better adjustment. For colors, the Phoenix is going to be dyed black and then the bird will be painted red, possibly with some orange and yellow highlights if I’m feeling daring. The Dragon gets a medium brown background with the dragon itself dyed black.

For that, I’m using the brush dye method, and here’s what it looks like at phase 1:

dragon_dyephase11

Astute observers may note that the dyed version doesn’t have grommets yet – that’s because I screwed up the dye process on the first attempt. I dyed the dragon and the background with the brush method the first time, but the brown dye just does not cover evenly, and I could not find a way to smooth it out for the life of me. This time, after I have soaked all the black I can into that dragon, I will apply a few coats of resist and then use a wool dauber to spread the brown dye right over the top.

And if that doesn’t work out, the next one gets dyed brown first and then I’ll paint the damn dragon on.